Phonto Tutorial #2- Adding Fonts to Phonto
Hey guys!
After reading the last post, I hope you made your templates in your own branded colors or with colors that make you super happy!
Now, I know a lot of you, ok...most of you, love fonts. I LOVE fonts.
I also have fonts that I've picked as my "brand" fonts that I use every time.
In this post, you will learn how to add your own fonts to Phonto so that you can use them every time!
Ok, here we go!

1. Download/Open the TPT app (if you purchased them there, and I hope you did :) It's the green app on the left :)
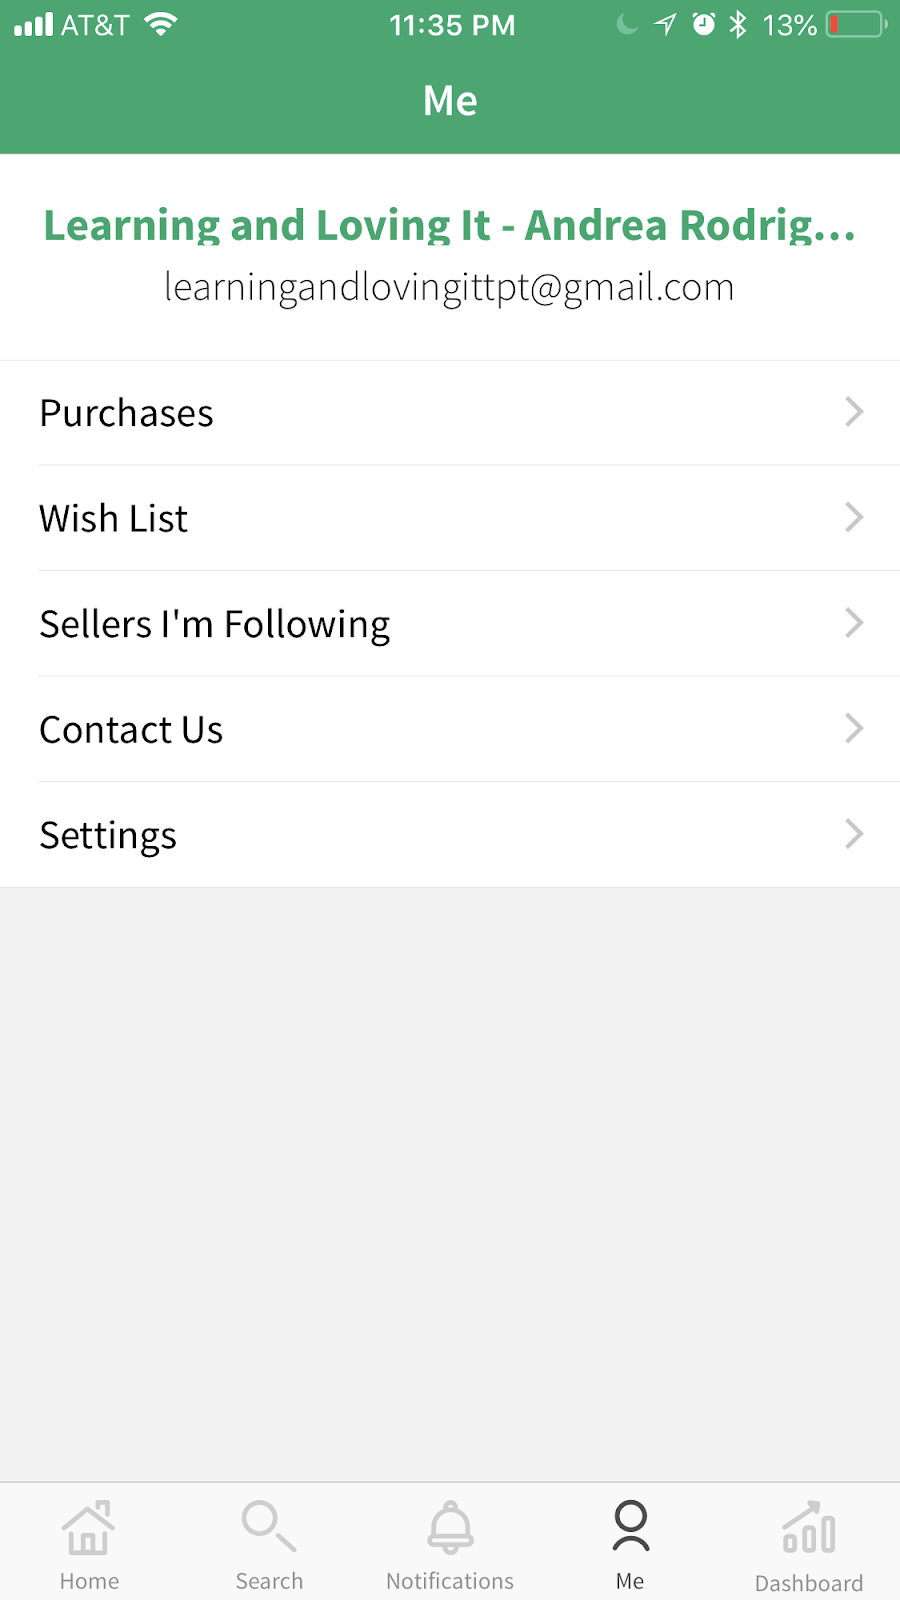
 2. Go to ME on the bottom and then to PURCHASES.
 3. Search for the fonts you want to download.
Hit access resource.
(I LOVE this bundle from A Perfect Blend! :))
 4. This will pop up and you will hit Send this resource to my email.
It will send you an email with your font bundle.
 5. In the email, click where it says DOWNLOAD HERE in blue letters.

6. A new window will open.
Wait for it to download.
(It might take a while if it's a huge bundle.)
When it's done downloading, it will show as a zip file and if you already have Phonto downloaded on your phone, it will say OPEN IN PHONTO. Press that :)
 7. Now, all of your fonts will
be listed on the left and on the right there will be buttons that say
INSTALL.
7. Now, all of your fonts will
be listed on the left and on the right there will be buttons that say
INSTALL.
 8. Click INSTALL on the ones you want on your app.
After you have installed the ones you want, click the X on the top left side.
9. Now you're done!
They should be installed and ready to use!
10. Say "YAY!"
In the next post, we will put both steps together and make a new graphic/quote to share on social media! Stay tuned for that post!
Thank you! I hope these have been helpful. I have appreciated all of your messages on Instagram about these blog posts. You're too sweet and I love talking to you all about this!
If you have any questions, just ask!
Don't forget to follow me on Instagram, Facebook, and Teachers Pay Teachers! I appreciate you!


After reading the last post, I hope you made your templates in your own branded colors or with colors that make you super happy!
Now, I know a lot of you, ok...most of you, love fonts. I LOVE fonts.
I also have fonts that I've picked as my "brand" fonts that I use every time.
In this post, you will learn how to add your own fonts to Phonto so that you can use them every time!
Ok, here we go!

1. Download/Open the TPT app (if you purchased them there, and I hope you did :) It's the green app on the left :)

Hit access resource.
(I LOVE this bundle from A Perfect Blend! :))

It will send you an email with your font bundle.


6. A new window will open.
Wait for it to download.
(It might take a while if it's a huge bundle.)
When it's done downloading, it will show as a zip file and if you already have Phonto downloaded on your phone, it will say OPEN IN PHONTO. Press that :)


After you have installed the ones you want, click the X on the top left side.
9. Now you're done!
They should be installed and ready to use!
10. Say "YAY!"
In the next post, we will put both steps together and make a new graphic/quote to share on social media! Stay tuned for that post!
Thank you! I hope these have been helpful. I have appreciated all of your messages on Instagram about these blog posts. You're too sweet and I love talking to you all about this!
If you have any questions, just ask!
Don't forget to follow me on Instagram, Facebook, and Teachers Pay Teachers! I appreciate you!


Comments
Post a Comment